Delivery related queries for FibreGlassDirect. If you need to track a parcel or enquire about delivery times check out our FAQ guide.
Yes, we can arrange to have an invoice sent by our accounts department. Please fill in our short contact form with your details and a member of our team will respond without delay.
(Product Price + delivery) + VAT at 20% = total cost
The cost of the delivery is calculated according to the weight of the order, the delivery location and the classification of the order (non-hazardous, hazardous and limited quantity). All items are despatched by courier with the exception of small items (non-hazardous items), which are sent via Royal Mail. See the Shipping/Returns page for further information.
For all orders received, we will endeavour to dispatch your order by the following working day and delivered within 2-3 days. For urgent delivery assistance please contact a member of our sales team direct through email or phone.
Yes, as most of our products are classed as hazardous they must be signed for. The exception to this is if the customer specifically asks for the goods to be left at an alternative location when making an order which is at their own risk.
Currently, we only ship to Mainland UK, Northern Ireland and the Republic of Ireland. If you are looking for fibreglass materials to be shipped to other countries, please contact our team for a quote.
As our goods are considered hazardous, delivery costs overseas are often very expensive. If you prefer you can appoint a courier to collect the goods at any of our depots and arrange your own transportation.
To track your order, use our order tracking form and we will contact you as soon as possible with an update on your order.
Understand the differences between Topcoat & Gelcoat, application details and characteristics.
Yes, our Polyester Topcoat is safe for use for Ponds. It is important to let the Styrene completely evaporate from the Topcoat before re-introducing the fish to the Pond.
The expected coverage of the Standard Polyester Topcoat and Gelcoat is 500g per square metre.
This depends on the type of mould you are trying to make (male or female). In this case, it sounds like you need a gelcoat rather than a topcoat. Please refer to our guide on making a mould which will detail the mould making process.
To answer this question in a lot of detail, we have created a comprehensive guide in our how-to section which is available to read on our website.
If the area has an old layer of Topcoat which you wish to refresh there is no need to prime the area with a product such as G4 for example. You will, however, need to sand down the area, wipe down with Acetone and reapply a new layer of Topcoat/GRP materials if required.
When applying a topcoat after laminating, apply between 500 and 550g per m². Alternatively, use our Materials Quantity Calculator. For Fibreglass Roofing applications, this should increase to 600g per m².
When applying Gelcoat to a mould, apply between 500 and 550g per m². Alternatively, use our Materials Quantity Calculator.
Gelcoat is not a finishing coat; it is painted onto moulds/plugs and remains tacky after it cures. Resin and Glass are generally applied on top of the Gelcoat. It forms the hard, smooth shiny surface of the finished article and is usually pigmented. It paints on easily but does not drain from vertical surfaces. Use Topcoat if a finishing paint is required.
Read moreAll of your questions in relation to Fibreglass Roofing answered here at FibreGlassDirect. Expert answers on all aspects of application including trims, topcoat and the laminating process.
Yes, a Fibreglass Roof can be walked on. Depending on the volume of foot traffic expected for the roof to take, this will determine the weight of matting that should be used in the construction of the roof. A roof with little to no foot traffic expected would suit 1 layer of 450g matting, a moderate level of foot traffic should use 1 layer of 600g matting and a balcony or a roof with regular foot traffic should use 2 layers of 450g matting. A non-slip Topcoat is also highly recommended for areas with foot traffic requirements.
In short, no. The deck would have to be sanded back to the fresh timber and wiped down with Acetone prior to any fibreglass application.
If you are looking to put the gully straight out through the wall, you could let it run through the wall and straight into a hopper, or alternatively use a through wall outlet and fix it so that the gully trim runs to it and out through the wall.
Another option is to go with a vertical downpipe roof outlet. Set the gully trim to run into that and the outlet will take the water down into a connecting pipe.
Whilst we would recommend GRP Trims with a fibreglass roof (the fibreglass will bond better). If you decide to use lead or metal trims, ensure the lead or metal is clean and free from contaminants. Use G4 sealer when overlapping with the fibreglass.
It is recommended that 15mm galvanised clout nail is used or s/s staples that will sit flush with the roof.
Roof trims should be measured and cut to size with a 'snips' (to reduce dust). A dab of roofing adhesive should be applied to the batons to prevent rattling in the wind. Roof trims should then be either stapled with s/s staples of nailed using 15mm clout nails into place every 120-150mm. Where two trims have to be joined together, ensure an overlap of 50mm and apply roofing adhesive to seal.
A drip trim is placed at the lowest edge of the roof and is used to allow the water to runoff into a gutter. A raised edge trim is used to prevent the water runoff.
Understand the many different applications in which fibreglass/grp is used in every day repairs.
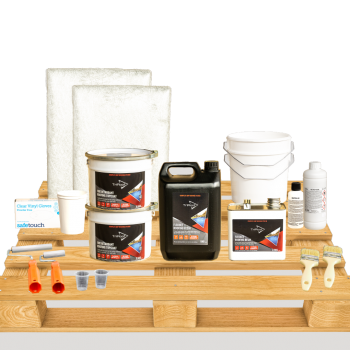
The best option is to use a Universal Fibreglass/GRP Kit.
This comes with glass matting, resin, topcoat, hardener and tools to apply.
The only additional item required would be acetone which can be bought in 1ltr, 2.5ltr or 5ltr containers. You will need the acetone for cleaning down, once you have scuffed the existing surface prior to applying the new laminate and also once the laminate is cured, again scuff the surface with 80 grit sandpaper and clean with acetone before mixing and applying the new topcoat.
Read more