Why choose Fibreglass for Pond Lining?
Using fibreglass/grp to build a pond is one of the most reliable, efficient and durable pond-building processes. Once the right technique has been followed and materials applied correctly, a fibreglass pond can last more than 20 years. Choosing fibreglass for your pond will leave you with a smooth surface once the topcoat has been applied, acting as a sealant. Once the matting is cured underneath, it will work in tandem with the concrete structure of the pond to provide strength.
Getting started
Ponds are generally constructed with a reinforced concrete base and with reinforced concrete block walls and are rendered/plastered to provide a flat surface for the fibreglass to be laminated onto. The vertical and horizontal corners in the pond require a slight radius so that the fibreglass sits properly, and the surfaces should be free from sharp points as this will make it more difficult to lay the fibreglass matting onto the walls and base.
The weather must be considered before commencing any fibreglass pond repair or construction. Work should be carried out during mild, dry conditions. The optimum temperature for any fibreglass work is 17°C. The plaster must dry out thoroughly when all the structural work is complete. Leave a dry section for access in and out of the pond; finish this area last. Start by laminating the walls coming down approximately 100mm onto floor space while the walls are curing finish with the floor.
Using G4 Sealer to Prime
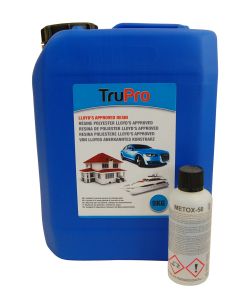
All concrete ponds should firstly be treated with G4 Sealer. G4 Sealer will protect the concrete from water penetration and act as a bonding primer for the polyester resin. It will also prevent toxic substances like lime from leaching into the pond. As it has a polyurethane base, it can be applied directly to the concrete and will cure to a tacky finish in around 30-60 minutes, depending on humidity. It should be painted on with a coverage of 250g/m2.
Working with the Resin and Chopped Strand Mat

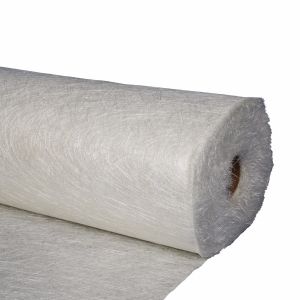
The chopped strand mat can be applied once the G4 sealer is tacky to the touch. In the FibreGlassDirect pond kits, we provide two layers of 450g mat and a layer of surface tissue. Two layers are provided for further protection from water permeation, while the tissue will provide a smoother surface.
Catalyst should be mixed with the resin at a rate of 2%. This should be thoroughly mixed. 2% catalyst will give the resin a 15-20 minute working time at 17°C. Only 2kg of resin should be mixed in at a time to prevent it from going hard. 2kg of resin will be enough for 2m2 of fibreglass.
Apply the mixed resin onto the pond's surface with a paintbrush or roller and then apply the first layer of chopped strand mat. More resin shall then be applied to the matting to ensure it is completely saturated. Apply the next layer of glass, which should overlap the previous layer by approximately 75mm and apply more resin. The joints should be staggered to avoid any overlaps. After both layers of chopped strand mat are applied, a layer of surface tissue is a used to provide an extra smooth finish to your pond lining.
Once the resin has been applied to both layers of fibreglass, a paddle roller can be used to consolidate the layers. This will bond layers together and remove trapped air. After 30 minutes, the fibreglass should be sanded down with wet/dry sandpaper to remove any sharp pieces from sticking out, which could cause harm to any creatures in the pond. At this time also double-check for any dry pieces of the mat which may have been missed when applying the resin or gaps which may have appeared after cure due to lifting. If necessary, repair, and then the fibreglass surface tissue may be applied. This should be wiped down with acetone before applying topcoat.ss matting.
Applying the Topcoat
Once the resin has cured, check again for any dry glass within the laminate, if you are satisfied with your work the Topcoat an be applied.
The catalyst must once again be added to the Topcoat, ideally at a ratio of 2%. If you require a faster or slower working time you may increase this to 3% but never below 1.5%. Mix enough Topcoat to cover 2-3m2 and apply similar to painting. 500g of topcoat is required per square metre of the surface area.
Before adding Fish to the Pond
It is advised to leave the pond for at least two weeks before introducing any fish as the Topcoat and Resins will still be going through the curing process. An earlier introduction will have a toxic effect as the resins contain styrene which evaporates during the curing process. The pond should then be filled several times to ensure all toxins are removed. Plants should then be added to the pond and if everything seems ok, the fish may be introduced.
Buying Fibreglass Pond Materials
FibreGlassDirect offers a complete range of Fibreglass Pond Kits up to 60sqm. Each Pond Kit can be purchased with a choice of Topcoat; Olive Green, Black, Dove Grey or Bright Blue. These vibrant Topcoats will really enhance the look of the Fish swimming against the bottom of the pond.
FibreGlassDirect have an excellent materials calculator which gives you the quantities you need to get started! We can give you the materials required for a circular or rectangular pond. Work out what you need today!
Not convinced that Fibreglass is the best option? Check out our blog on how Fibreglass Pond Lining Material is a Clear Winner for your Garden Pond Today!